Here’s another handy tip if you are brave enough to attempt to render a wall yourself.
Please remember if you have never done it before, please get a professional in, but by all means ask them if you can watch how they do it, it’s how I myself began to learn to render a wall, many years ago.
A professional plasterer or tradesman would be only to happy to oblige as long as you don’t get in their way!
When preparing for rendering.
It is important to remove any dirt and grime from the wall surface.
The most efficient way of doing this is to hose down the area with a strong jet of water or pressure washer.
If there is evidence of mould growth on the wall, use a fungicidal wash over the area before starting the repair. When using a fungicidal wash, please read the instructions on the tin or container.
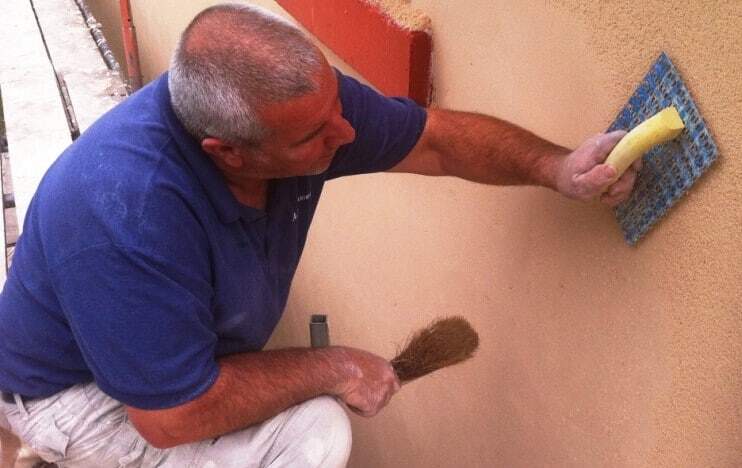
How to apply a render external coating
Please also keep pets and animals away from the work area. It is good practice to wear a mask and gloves when doing this, and to wash off any splashes onto your skin promptly. Remember don’t handle wet cement, it can cause skin irritation and burns.
Always wear eye protection when doing this type of work. If the brickwork still looks shabby after cleaning off the surface, rendering could improve the appearance.
Traditional external render is a coating of sand and cement. A coating can also contain small stones or chippings, which is called roughcast.
This can be a difficult job, best results often applied by an expert.
However there is a mix available for the DIY enthusiast, known as Tyrolean rendering, which is a dry mix.
How to apply render
Once applied to the surface, allow it to dry before applying a layer of masonry paint. Please note that tyrolean can become brittle over time and only has a specific life span.
It can be costly to replace, however some exterior wall coating companies can repair it and cover it with a flexible external coating.
What is the condition of the render?
Cracks
If a crack has occurred in the rendering, it could be due to a structural fault or settlement.
If there are any cracks in the rendering they should be filled.
Widen the crack with the point of a trowel or old screwdriver, as this will make a wider area for the filler to key to. Brush away any loose dust or render before applying exterior filler. Press it in well, pushing into the gaps.
‘Blown’ or hollow rendering.
If you tap an area of render and it feels ‘live’, it will probably sound hollow. This means the render is no longer bonded to the wall behind and has lost adhesion.
If it has blown, it may appear to bulge away from the flat wall and should be broken away carefully to remove all loose render.
Again, make sure all pets and especially children are well away from this work area.
Then you should brush away any loose dust and widen the area around the edge with the point of a trowel or old screwdriver to improve the bond before applying new render.
It is good practice to use a mortar mixture comprising of cement : building sand in the ratio 1 : 4. Add a little PVA bonding agent to improve the bond with the surface behind. (PVA is sometimes known as Unibond, which is the most popular brand).
If the render still feels firm, it can be left, but needs to be checked on a regular basis, and replaced if there is deterioration in the surface bond.
If the patching is obvious and in a very public area, it may be worth considering painting the wall for an attractive alternative finish.
Dealing with a Pebbledash exterior wall
If small stones or chippings are thrown onto the sand and cement mix already applied to the wall surface, the finish is known as a pebble-dash surface.
Pebbledash is a popular surface coating, consisting of a thick base coat covered with a thin coat of render and small stones.
It has gone out of fashion now, and exterior wall coating companies are often called in to repair and paint the pebbledash.
Cracks?
Small cracks should be filled as with cracks in render.
Remember paint will NOT fill cracks, they have to be cut out and filled properly
‘Blown’ pebbledash?
It could be the thin layer has separated from the thick base coat or the whole surface has separated from the wall behind.
Carefully break away the loose area and determine the extent of the damage.
If the thin top coat has separated, use a stabiliser to seal the surface and repair the surface.
If the damage is through to the wall, replace both surfaces in two stages, allowing the thick base coat to dry before applying the thin pebbled layer.
If the pebbledash is to remain unpainted, try to use some of the original pebbles as replacements.
If the patch is too obvious and in a very visible area, it may be worth considering painting the pebbledash wall for an alternative attractive finish.
Alternatively why not call NPA for a free appraisal of your exterior walls?

