We delve into the never paint again archives to look at how damaged or mismatched brick can be covered with render and protected with a weatherproof wall coating.
This house painting system lasts for up to 20 years minimum and we see how Rendering a brick house can bring many benefits.
Today we look at a house near Spalding in Lincolnshire, which had an exterior wall with unpainted bricks which over time had become loose and brittle, requiring immediate action to protect the walls with a render coating.
In addition to the issues and problems the owner had with how the walls looked, there had been several alterations over the years, and extensions too, all of which had left the building with a pattern of about 5 different types of brick.
Great for LEGO, but not for a house.
The owners wanted a uniform finish, the same across the entire wall surface, but of course merely painting over the brick with paint, would bring its own problems as the house would then need to be repainted every year, something the owners did not relish for one minute.
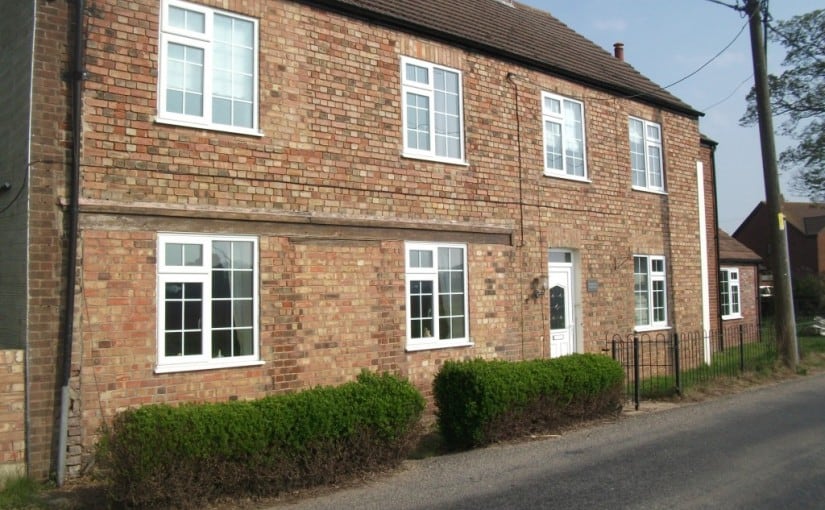
Here’s the Lincolnshire brick house before we started.

You can see that the left hand part of it was originally a shop, note the large lintel and the bricks where the shop door used to be.
The right hand side of the photo you can just see 2 different extensions, both of brick, but added at a later stage.
The entire house was a mis-match of various bricks and to be honest, although a very nice house, the current exterior appearance did not do it justice, I am sure you would agree?.
Rendering over brickwork.
The client for this project wanted a smooth render finish, which in order to achieve that, we would have to apply a render coating to the house.
Because render needs further protection from the weather, we were to apply a coating of NPA textured exterior masonry coating for this type of job.
The brick themselves were in fairly good condition so only minor areas of pointing removal and replacement were needed on the main walls, and we had to remove the old lintel above what would have been the shop window.
However the rear of the property really got hit by the weather, and the condition of the bricks, as you can see from the image below, was pretty bad, showing a gradual erosion and collapse of some areas of brick, which needed urgent attention before we applied the rendering.
Badly eroded bricks require attention before they get much worse

Getting started to render the house.
Once the major areas of concern were attended to by the wall coating teams, the rendering experts got to work applying the first coat of sand and cement render, normally known as the scratch coat.
The scratch coat is an essential part of the process
Rendering a brick house. 2 coats of render are needed
The image below shows the scratch coat of render after we applied it to the walls, and allowed to dry.
This image is from the other end of the house and shows the extensions we mentioned earlier on.
Then afterwards, we applied to the top coat of render to a smooth and clean finish.
We then masked up the doors and windows, covered the ground with dust sheets, and then hand applied a waterproof primer.
This gives the house damp proofing all over, plus it gives a good surface to accept the final coat, the spray applied external wall coating that we are most famous for!
Applying wall coatings to new rendered walls.
The image above is of course “work in progress” and shows the primer has been added to the walls, which are all now smooth rendered and match in quite well don’t they?
Of course as you can see, we’re not finished yet (!) so the final task is to get the spraying system ready and primed for us to apply the masonry wall coating, which is often the quickest, and in fact most satisfying, part of the whole job.
The final job! A transformation from a brick house to a rendered house.
Here you are!
The clients were of course delighted, and what a transformation this has been!
This house now has a totally uniform external wall finish with a rendered surface, and NPA Never Paint Again texture coating, which is guaranteed to stay white, for up to 20 years, and comes with a 20 year guarantee too!
To find out how much this system would cost for your house, send us an email!
Or call the team today, on (0800) 970 4928